- Published on
There is no lighting system in Video Vector. Well, that was easy. 😂
However, you can control any face color with expressions... so... you can make your own!
The default scene has a series of defined expressions that allow you to control world "lighting." However, they are just a template to start playing with world, camera and object scoped lighting yourself and develop your own lighting system. Let me explain...
% 640 480 : 10 * 30 #video size, length and fps
& _ 0 0 10 ^ 0 0 0 v 90 < 0.01 40 #camera details
? lightX = 1
? lightY = 1
? lightZ = 1
? lightLen = ^"max(0.0001,sqrt((lightX^2)+(lightY^2)+(lightZ^2)))"
? lightDirX = ^"lightX/lightLen"
? lightDirY = ^"lightY/lightLen"
? lightDirZ = ^"lightZ/lightLen"
? worldFaceLight = ^"max(0,(Fnxw*lightDirX)+(Fnyw*lightDirY)+(Fnzw*lightDirZ))"
? worldLineLight = ^"max(0,(Lnxw*lightDirX)+(Lnyw*lightDirY)+(Lnzw*lightDirZ))"
[ geode
: sphere 20 40 4
> c rgb worldFaceLight worldFaceLight worldFaceLight
: >
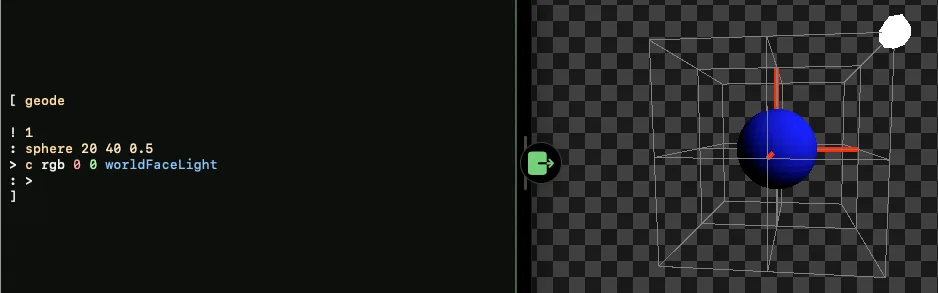
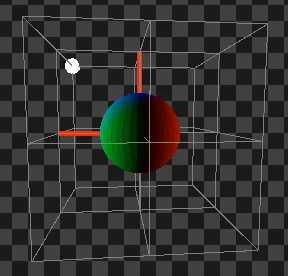
]In the above lighting example scene, "lightX/Y/Z" is the effective position/direction the light is coming from. It's in terms of X Y Z from the origin at 0,0,0. The following is lightX/Y/Z at 1, 1, 1 (the scene default)

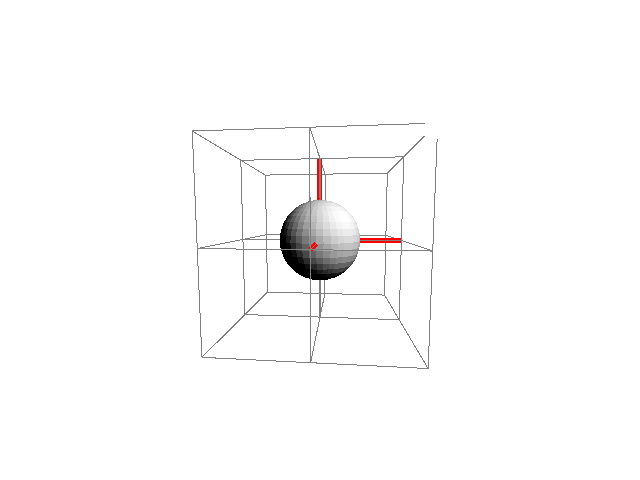
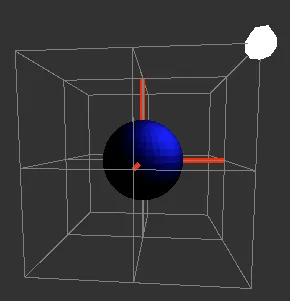
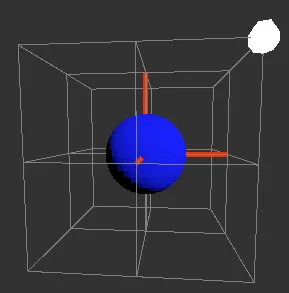
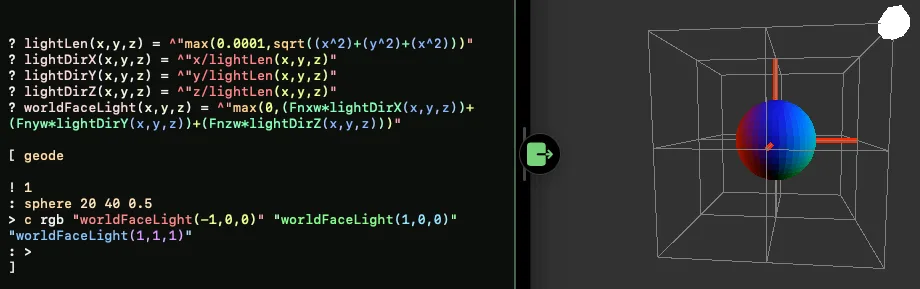
Scene axis are +X right, +Y up, +Z towards you, the red lines above.
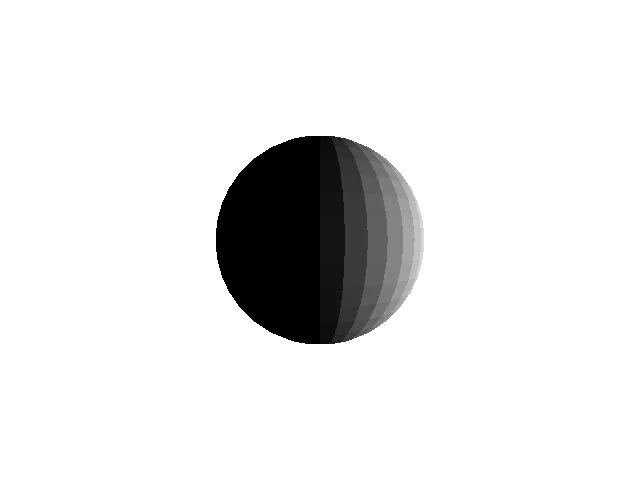
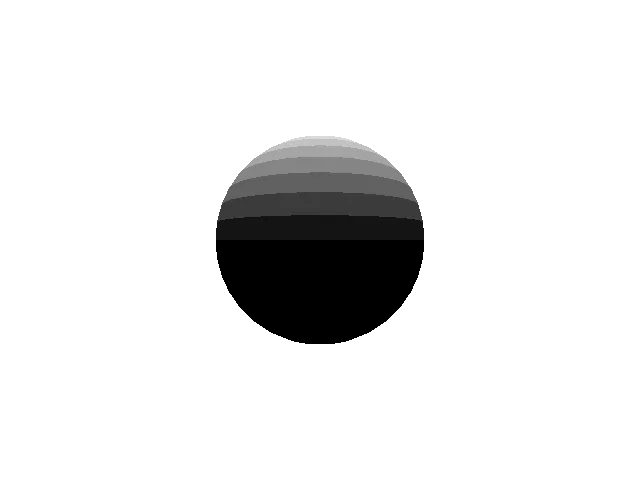
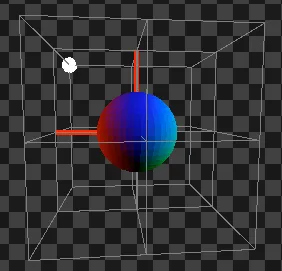
These spheres show if you place the light at just one axis, either X or Y or Z:
The rest of the expressions take the light position, normalize the vector, and apply it to world space, relative to the faces' normals (perpendicular direction out from the flat surface of the face), creating "worldFaceLight." Additionally, "worldLineLight" does a similar thing with lines. Line normals are a bit different and I'll explain later, but the thing to take away here is this block of user defined expressions gives you a single method to apply to color channels to affect their coloring.
? lightLen = ^"max(0.0001,sqrt((lightX^2)+(lightY^2)+(lightZ^2)))"
? lightDirX = ^"lightX/lightLen"
? lightDirY = ^"lightY/lightLen"
? lightDirZ = ^"lightZ/lightLen"
? worldFaceLight = ^"max(0,(Fnxw*lightDirX)+(Fnyw*lightDirY)+(Fnzw*lightDirZ))"
? worldLineLight = ^"max(0,(Lnxw*lightDirX)+(Lnyw*lightDirY)+(Lnzw*lightDirZ))"
worldFaceLight/worldLineLight ultimately returns a number 0...1, based on where the light is and where the face normal is facing. Facing directly at the light source = 1. Facing directly away = 0.
Fnxw, Fnyw, Fnzw are special variables for the normal of the Face x/y/z in world space. See the Scene Reference Guide in the app for more information on 'F' variables and their notation scheme.
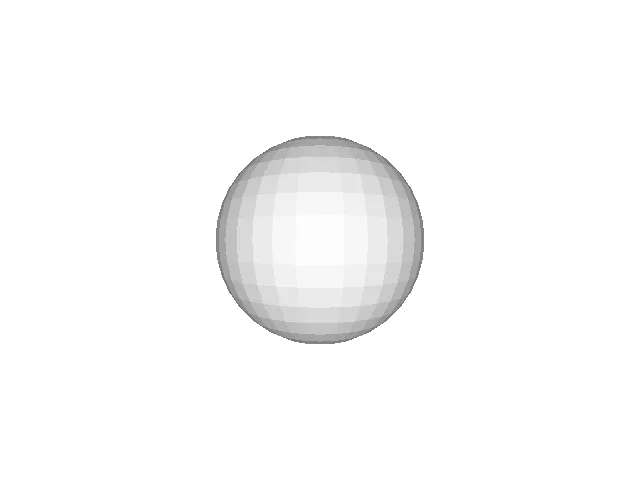
Since worldFaceLight is 0...1 and RGB color channels accept normalized 0...1 as values, you can make a sphere (with a 4 radius) shaded white with:
: sphere 20 40 4
> c rgb worldFaceLight worldFaceLight worldFaceLight
: >
See "Presets" in the Scene Reference Guide in the app for ': sphere' and the general '> c rgb ...' and ': >' notation. But basically, '>' inside ': ... :' lets you set the face properties, like in this case color. The ': >' closing bit ends the Preset and says render just faces. ': - >' is render both lines and faces, ': * - >' adds points. You can mix and match which geometry to actually render.
So, in this case the RGB channels for each face will all be the same values, so they will be white/gray/black depending on where the face is pointing relative to the lighting position in world space.
if you want to make the sphere blue then:
: sphere 20 40 4
> c rgb 0 0 worldFaceLight
: >
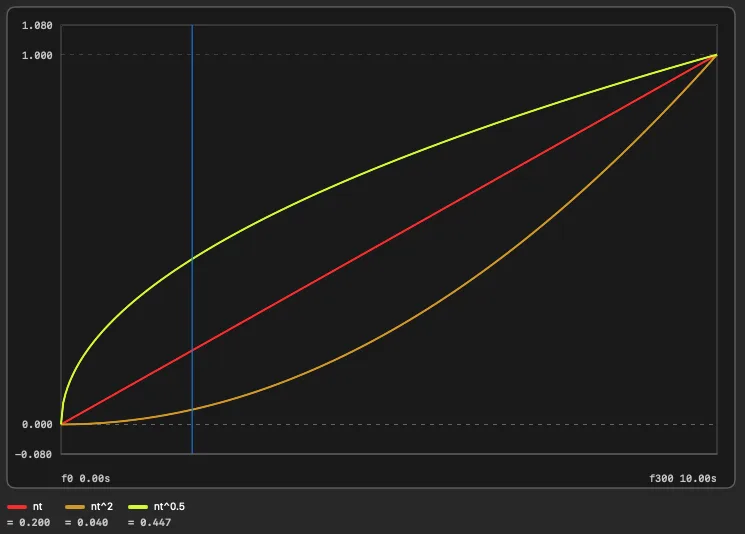
Since worldFaceLight is a range of 0...1, you can vary how it transitions between 0 and 1 using powers and roots, like worldFaceLight^2 (squared) and worldFaceLight^(1/2) (square root) instead of just using the direct value. By applying what is effectively a lerp with a easing transition, you can affect the amount of the light source and it's focus on the surface of the object.
You can see, at a value of 0.2, the square is 0.04 or 4% near black and the square root is 0.447, 45% gray. So the larger you make the power, the tighter to the light source it gets (tight beam, dimmer or more glossy shine), and the smaller you make the root, the wider the light becomes (a greater ambient lighting, brighter the light source), enveloping the surface.
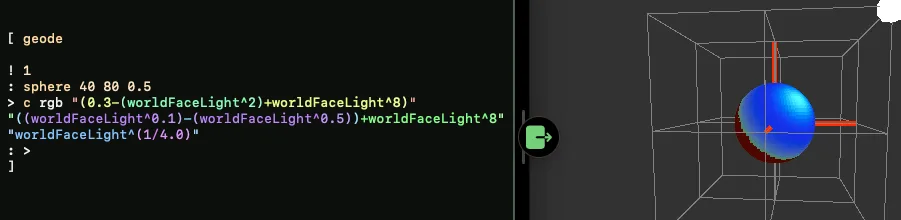
You can do some fun things if you play with each color channel differently...

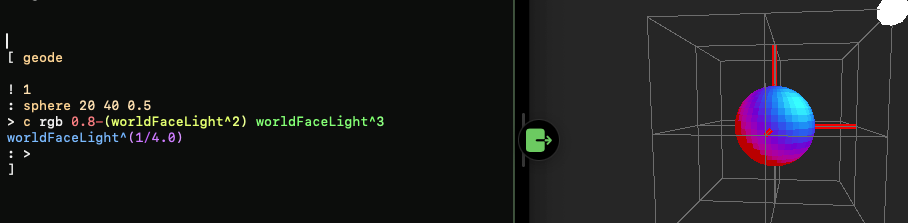
Blue is designed to cover more, green is designed to be a finer highlight, while red uses a darker version of '1-value' to flip the light and dark sides, so red is focused on the backside, fading into blue.
Even more... bringing the red down and creating a band of green added to the green specular highlight... the band being the difference between one green that covers more and another that covers less. It's pretty crazy to think this is purely coloring a face one at a time with the same expression, yet you can achieve a chrome like effect as each face effectively becomes a pixel itself, if you increase the number of faces. In this case there are 3,200 faces on the sphere.
Now, you can take this even further by creating different lighting sources and adding each light source to the color channels. Defined expressions can pass in arguments, so you can create an expression that passes in your lighting direction per method call...
Everything I've been talking about is in world space, Fn{x/y/z}w. That basically means these light sources are like the sun. If you move the camera to the back, you see the shadows and such of the scene from the world lighting source still remaining where it was, though 1,1,1 blue light is now in the upper left back corner of your view.
However, Fn{x/y/z} also has Camera space variants: Fnxc, Fnyc and Fnzc.
And using those instead, in the worldFaceLight expression, the back side looks like the front side... in fact all sides look the same... because now the light sources are based on the camera space... so you can think of the positions of the lights now as mounted on the camera like a flash, moving and focused with the camera view. World space hasn't changed, but now the sphere is colored based on where the camera is positioned and facing.
There is also Object space. Fn{x/y/z}o or by default, just Fn{x/y/z}, default is in object space if you don't specify.
Object space as you can imagine is then lights bound to the object's perspective, instead of the camera or world. Effectively, it's like painting the surface. If it rotates, you see the colors mapped to the surface rotate around as well. For object space, the orientation is similar to world space initially, effectively spray painting an object as if it was world space.
With those three types of World, Camera and Object space face normals, Fn, you can create an incredible amount of effects in your scene. Buildings could be a base color scheme, but the glow of the morning sun could back light the sides. A car could drive by and world lighting source added matching the position of the front of the car.
You just need to keep in mind the +X, +Y, and +Z of the space you are working in.
___
I should mention, Points have no normals, so they get pretty tricky to color. I initially thought of points as a point cloud, always aligned to the camera. They are not rendered in the same way in scene. If you want each to be a small cube, rotating and moving with the object, it's best to create actual cubes. However, you could consider using their position from object center as a normal. If the shape is simple, like a sphere, the position vector acts as your normal.
Lines are a bit unique as well, because they technically shouldn't have normals, but if they share edges with faces, I take the average of the face normals to give them their own normal. So, that is why they do have normals you can leverage.
Lines also have Lperp as a special variable, which is like a normal, but is the degree at which they are perpendicular to the camera. So if they are flat against the camera its 1, no matter their orientation, and if they are pointing away/towards its less, pointing directly at the camera effectively looks likes like a point and is 0.
If a line has no normal/connected faces, then the Lperp value is used as a fall back. So be aware you can get different coloring behavior depending.
Lines also have a pointing direction variable Ld{x,y,z} which is effectively like the Lperp but direction matters. So, they can look great depending on different setups. But be warned... it's kind of smoke and mirrors and if you don't structure things just right you'll start to see the truth.
It isn't the spoon that is being lit... the truth is there is no spoon... lighting.